5 Tips For Photographing Manhattanhenge
Updated with 2023 dates! Please be safe and practice social distancing if you decide to see or photograph this year's Manhattanhenge.
For 2023, Manhattanhenge will happen on May 29, 8:13pm (Half sun) and May 30, 8:12pm (Full sun) and July 12, 8:20pm (Full sun) and July 13, 8:21pm (Half sun).
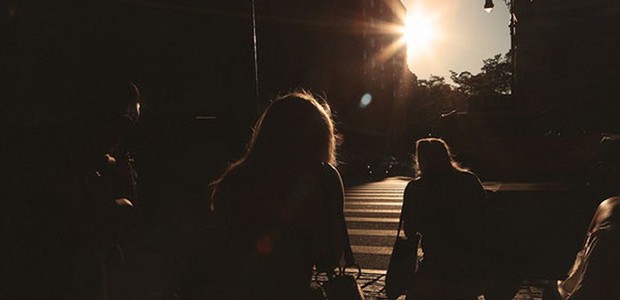
Have you ever been hurrying home on a summer evening in Manhattan, only to notice a strange spectacle: photographers (with both iPhones and fancy DSLRs) crowded in the middle of the streets, tripods set up one in front of the other...set up dangerously close to recklessly swerving cabs. “Why on Earth would all these people risk life and limb…?” you may wonder.
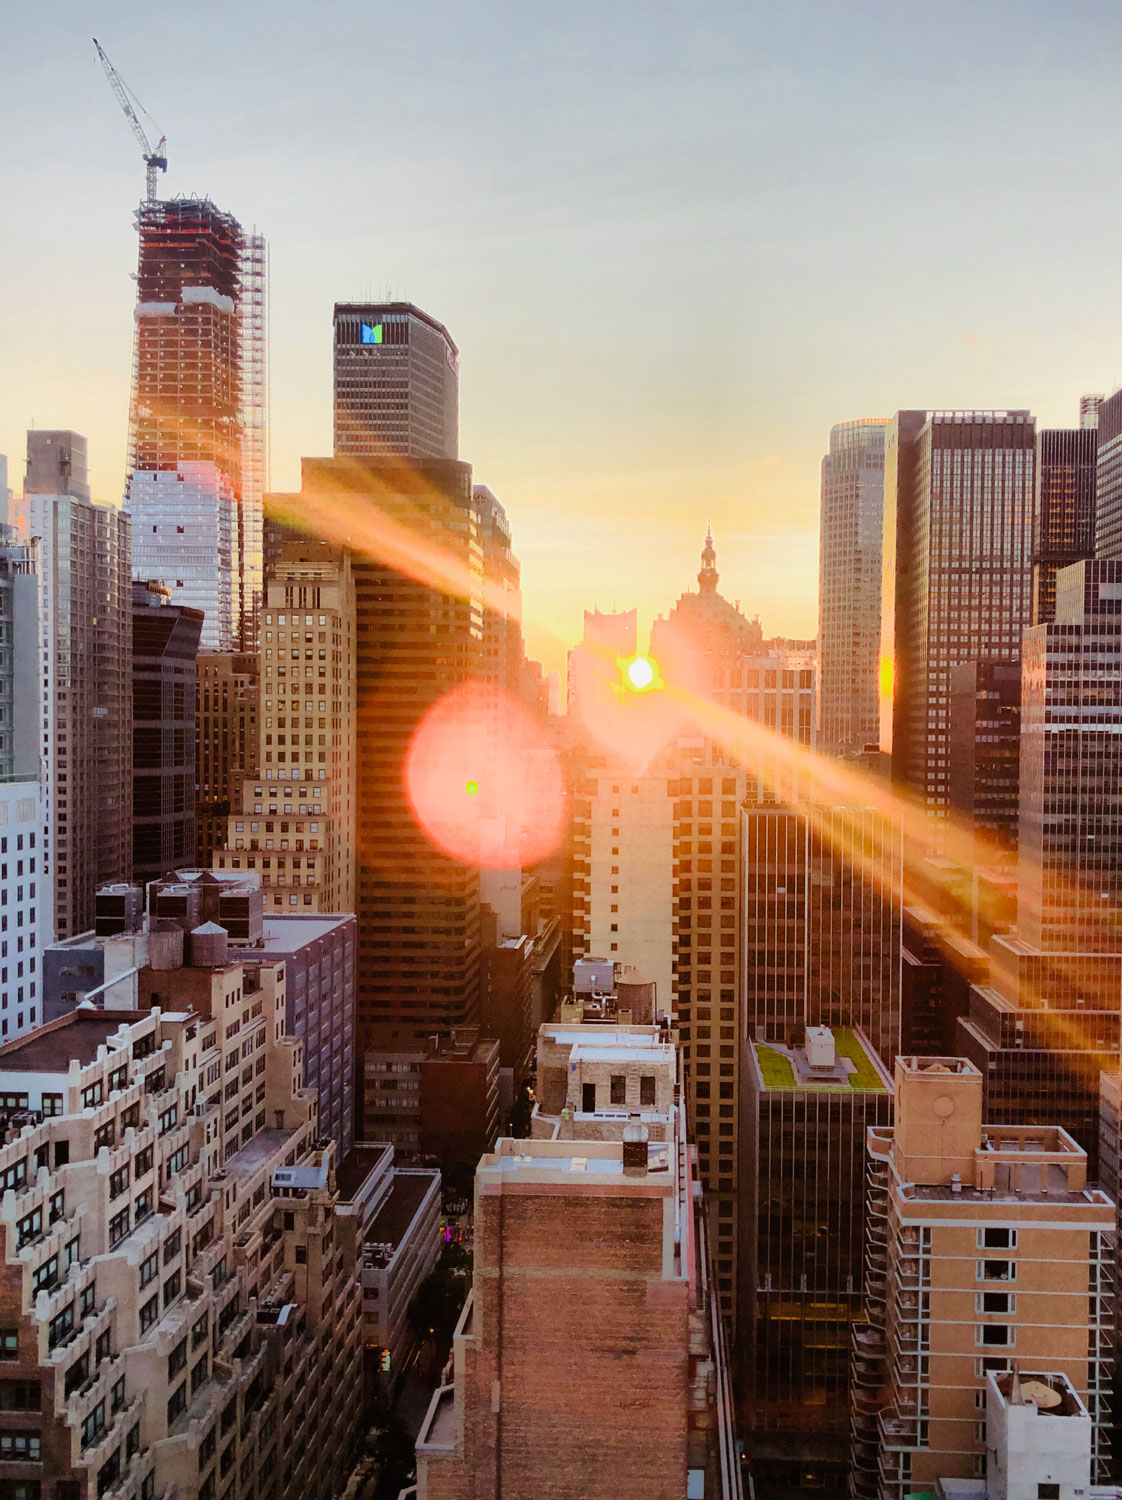
On a select four evenings every summer, the city’s cross streets are flooded with shutterbugs, waiting eagerly for a magical moment. This is New York City’s own special summertime celebration, which takes place approximately two weeks before and two weeks after the summer solstice. If you face west and peer through the concrete canyons, you’ll be treated to the sight of the sun setting in perfect alignment with the city street grid. The blazing red ball momentarily floats above the distant horizon, casting a golden glow on the city street. If the weather’s clear, it’s a sight you won’t soon forget!
So how can you go about getting a striking shot of this rare vision? Read on for a few tips that can help you capture this stunning cityscape.
1. Location, Location, Location
Just like the Manhattan market, real estate is everything, and it comes at a high premium (see tip number two). First and foremost, remember, you have to be on the city street grid--so stay at or above 14th Street to be safe. For the clearest views, your best bet is to situate yourself on the widest crosstown streets, like 14th, 23rd, 34th, 42nd, and 57th Streets. Remember to look around for famous NYC landmarks to enhance the sense of place in your images. For example, if you set up on 23rd Street, you might include the Flatiron Building (historically, a favorite subject of many famous photographers!), the Empire State Building if you go to 34th Street, or the Chrysler Building if you wind up on 42nd.
2. Make A Plan
The prime locations for this shot are going to come at a cost: You absolutely must arrive well ahead of time to get a good spot! Be sure to check the sunset time before leaving home. It’s best to get to your chosen location as much as two hours ahead of the sunset. Even then, don’t get too upset if you find that the late comers start crowding in around or even in front of your camera...it can get a big competitive, so stake out your territory early and protect it as best you can. But try to look on the bright side: Arriving early gives you time to capture the atmosphere as all the other photographers get ready!
Your early arrival will also give you plenty of time to set up your gear see the following tip for what to bring, and consider your exposure setting--our next two tips.
3. What to Pack: Choosing Equipment
As everyone gets their gear set up, you’re guaranteed to see every kind of camera imagineable, from iPhones and GoPros to the sleekest DSLRs on the market. Ultimately, there is no right or wrong camera to bring, but here are a few suggestions as to what equipment may serve you well.
- Tripod: A good, sturdy tripod is essential. As the sun sets, the lighting will be changing constantly, and you’ll be working in low light conditions by the end of the event. To guarantee nice, crisp images, steady your camera with a tripod. This will allow you to use slow shutter speeds that can capture motion blur photos. Just be mindful where you place it--you don’t want to get hit by a passing car or bicycle!
- Shutter Release Cable/Remote: If you’re going to bring a tripod, you might as well pack a shutter release cable or remote to go along with it! This will prevent blurriness in your pictures that may result from actually pressing the shutter button as you take your shot. If you don’t have one of these, you may try using your camera’s self-timer. But be aware, you won’t really have the split-second reaction time you might want.
- Zoom Lens: A zoom lens with a variable focal length is going to be a great versatile option. You may find you need a wide angle if you want to include some nearby landmarks--but you’ll probably also want to get a close shot of the sun itself as it’s setting. A zoom lens will let you switch angles quickly, which is crucial as the light changes. A lens that falls somewhere in the range of 18-85mm should help you cover all your bases. If photographing from Gantry State Plaza, use a long telephoto (70-200 mm).
4. Setting the Exposure
Now that you’ve gotten your equipment sorted, it’s time to talk about the actual image. You’d do well to set up your camera settings as you would for a landscape--or in this case, a cityscape. Try to keep everything sharp, from foreground to background, by creating a deep depth of field. You may try photographing in Aperture Priority mode, so that as the sun sets, you don’t need to worry about changing your shutter speed every other second. If you’ve got a tripod, you can use a low ISO to ensure the best image quality.
Use a high f-stop, such as f11 or higher (small aperture) to achieve the starburst effect on your Manhattanhenge photo.
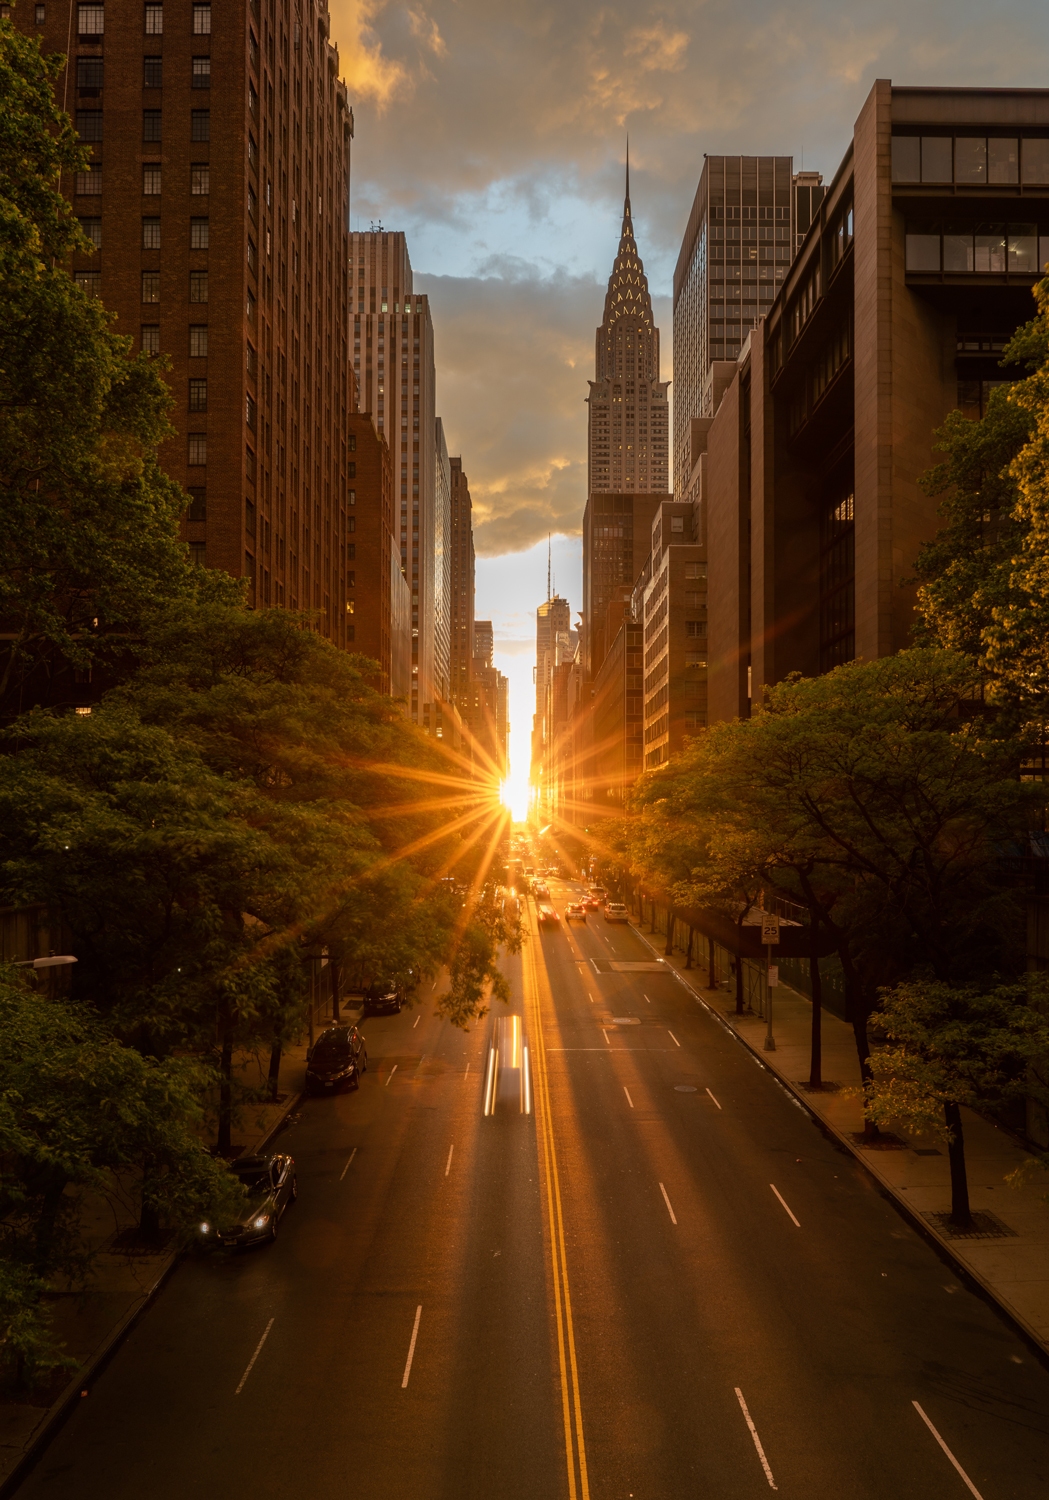
ISO 100 f18 2 sec shutter speed. 24 mm lens. Starburst effect.
5. Get a Leg Up
Our final tip is to think about bringing a small, foldable step ladder or stool along with you. This may sound strange, but Manhattanhenge truly does bring out thousands of people. In these crowds, a little stepladder can help you rise above the crowd. Keep in mind, though, that it may be harder (or even impossible) to use both your tripod and the step ladder...but if you arrive late, or you don’t have a tripod, the step stool could save your shot!
5 Photography Tips for Manhattanhenge
- Any camera will work for photographing Manhattanhenge.
- Photograph in Aperture priority or Manual Mode and use a high f stop (f11 or higher) for the starburst effect.
- Use a tripod to steady the camera if you want to utilize a slow shutter speed. If you don’t have a tripod, increase the ISO to allow you to increase the shutter speed so you can comfortably handhold the camera.
- If using an iPhone, lock the focus on the sky and lower the exposure to make sure you capture the tones of the sky.
- Include famous New York City landmarks, the NYC skyline when photographing the Manhattanhenge.
iPhone photography Manhattanhenge.
Comments
Sign in to comment.