HDR Photography
What is HDR Photography?
So, you have started taking your photography more seriously.
You’ve taken a ton of photos from your recent trip and found out that it's not that easy to make some of them look like what you've seen with your own eyes…
If this is correct, you might be “fighting” with a limitation of the technology you are using to capture the photo.
Your eyes (and brain) are able to "see" scenes where there are different tones between the brightest and darkest areas.
However, your camera’s digital sensor might not be able to capture all those different tones.
When you take a photo, you or your camera (if using fully automatic mode) decide if your photo will include detail in the areas with more light or less light.
However, most cameras are not able to capture the whole visible tonal range.
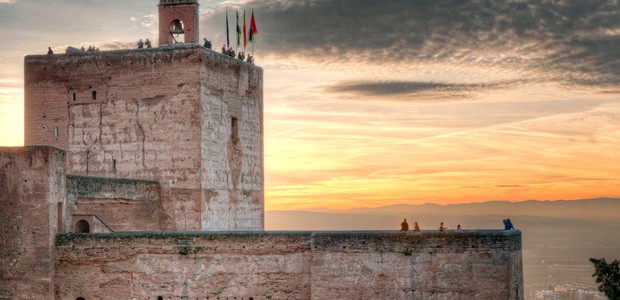
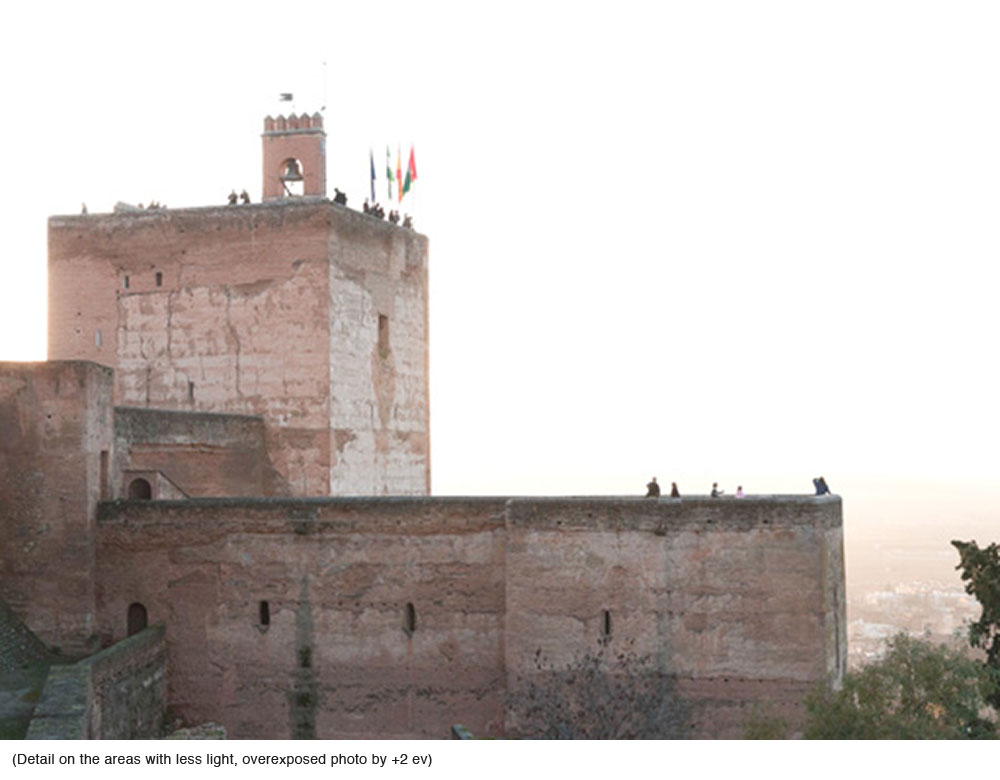
The following image is a good example of what a “tricky lighting” situation is:
The bright light of the sunset is to strong, so the camera tries to capture some detail on the sky, rendering the building in the foreground almost black.
You end up with an image with an "ok" sky, and a black silhouette of the building you were trying to photograph; not exactly what you were seeing while standing there.
Whenever you find a scene with lots of light in certain areas and little in others, you might need a little help to handle the limitations of your camera and be able to take a photo that will resemble what you've seen.
There are many ways you can manage these situations.
The three most common ways are:
• Graduated neutral density filters (a graduated gray filter you mount on your lens and use to minimize the difference between the light and darks areas of the photo)
• Zone post-processing (dividing the image in zones according to their exposure and editing them one by one on your preferred photo editing software)
• High Dynamic Range (HDR) photography (keep reading if you want to know more...)
As with everything, there are benefits and drawbacks of each technique.
If you want to learn more about any of them, you'll find a lot of information, tutorials and discussions on the net.
Through the years, I've tried each of them and nowadays I use HDR for most of my travel photography.
In this article I'll give you a brief introduction to HDR photography, the technique and some tips so you can try it for yourself.
How to do HDR Photography
Let's start with the steps you'll have to follow to create an HDR photo:
1. Capture: First, you'll need different exposures of the same scene (you can get these with a sequence of photos or a single RAW file processed several times with different exposure settings).
2. Create the HDR image: Once you have a set of images that include that wide range of "tones", you have to "blend" them together using an HDR application.
3. Tone mapping: Since screens and printers are not usually able to display such a wide range of tones, you have to convert it into something your computer can display/print. This process is called "Tone-mapping".
4. Post-processing: after tone mapping, you'll end up with an image that needs a lot of work. You will need to improve contrast, correct color casts, eliminate "ghosts"...
You will find a lot of alternative ways to cover each step.
I'll briefly describe the way I do each of these steps and hopefully it will be a guide for you so you can experiment with them:
1. Capture
We need a set of images that contain a wide range of tones from the scene.
The most common way to do this is by using the "exposure bracketing" feature of your camera.
If you have an advanced point & shoot, mirrorless or DSLR camera, you will probably have this option.
If not, you would need to take different exposures using your "manual mode" or the "exposure compensation" feature in Aperture (A/Av) or Shutter Speed (S/Tv) modes.
Exposure bracketing will let you configure how many photos you want to take of the scene and the exposure stops/steps separation for each image.
When enabled (and depending on the way your camera works) and you start photographing the scene, you'll get a set of photos with different exposures.
The set of photos you take with different exposures should be as similar to each other as possible on any other variables, so you'll have to consider the following:
• Use a tripod whenever possible (to minimize shift on the composition from one photo to the other)
• Use the same aperture (so the depth of field is the same on every photo)
• Maintain the focal point (focus on the same area/distance)
I often take a set of 5 exposures with steps of 1 stop between photo, but the number of photos and the steps between them depends on each scene.
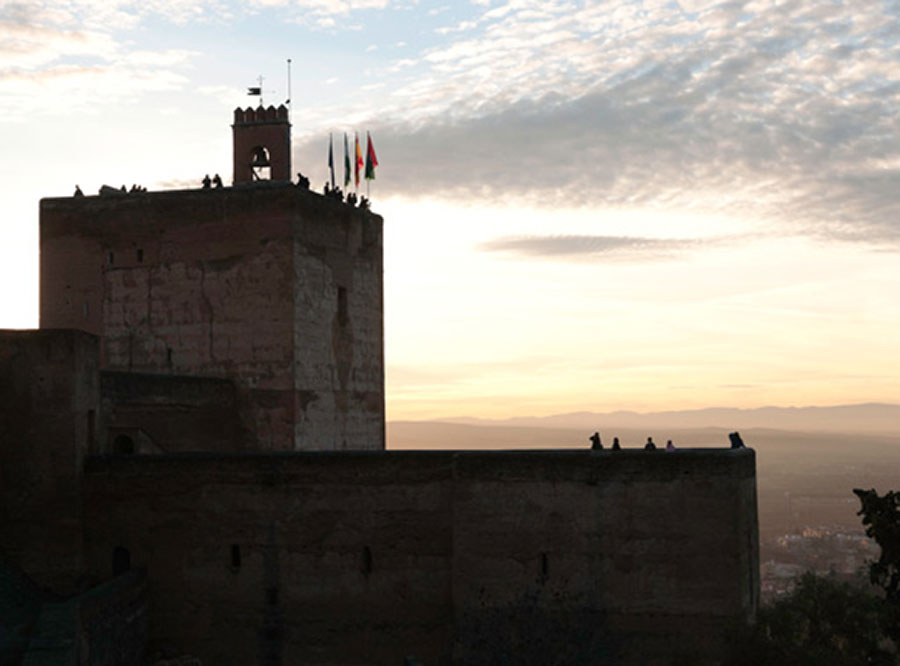
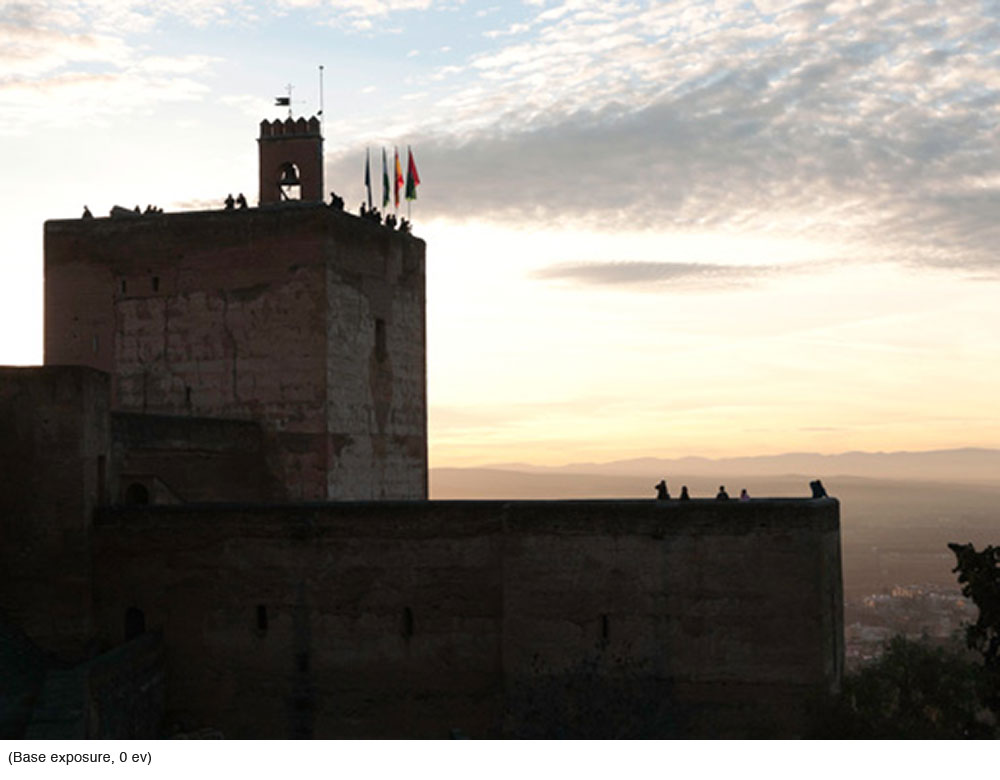
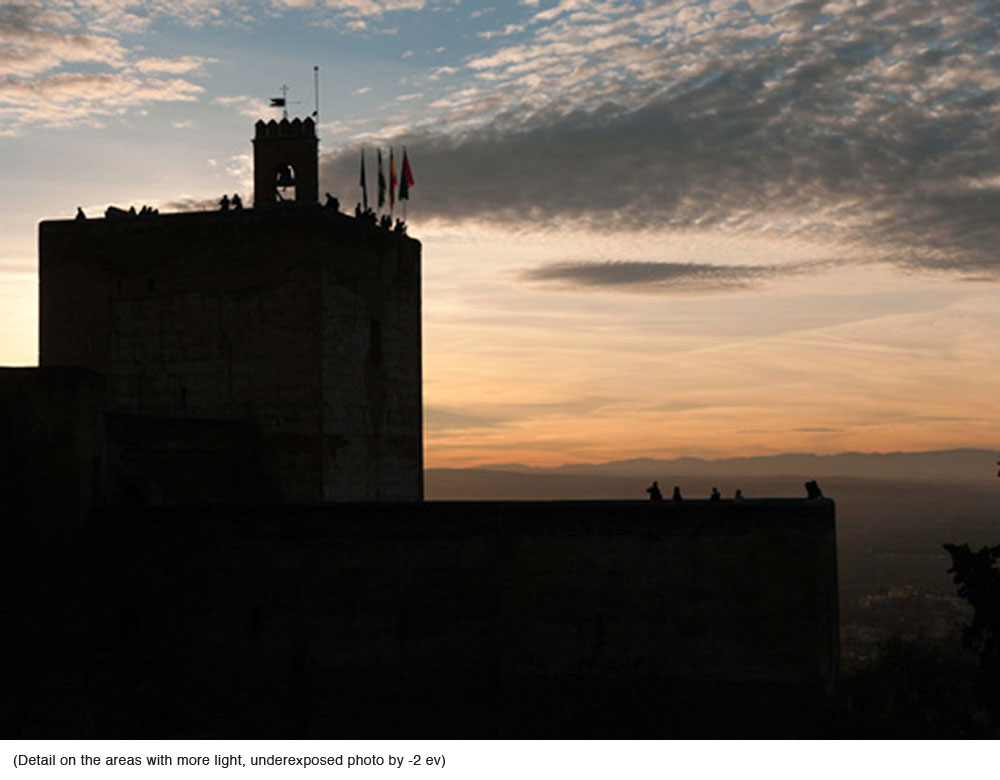
To create the HDR photo of the Alhambra at the beginning of this article, I took a series of 5 photos and used the following 3 exposures to create the image:
2. Creating the HDR image
For this step, you'll need software capable of "mixing" the different exposures you took of the same scene. The one I use the most is called Photomatix (http://www.hdrsoft.com/) but there are others you can try:
• Photoshop's "Merge to HDR Pro" and "HDR Tone-mapping" tool (CS5,...)
• Nik HDR Effects PRO (http://www.niksoftware.com/hdrefexpro/usa/entry.php)
• Unified color HDR Expose 2 (http://www.unifiedcolor.com/)
• Luminance HDR (http://qtpfsgui.sourceforge.net/)
When you have your set of images on your computer, you'll need to open them up in your preferred HDR software and start by creating the HDR file.
In case you use Photomatix, you'd start by "Loading Bracketed photos" on the File menu. After that, you would have to select your images and decide if you want/need the program to align the photos (if you use a tripod and proper technique, you won't need that), reduce noise, chromatic aberrations… at the end of this process, you'll end up with an HDR file that looks "funny" but has all the relevant information from the exposures that you've merged.
 Alhambra Image before Tone Mapping.
3. Tone-mapping
To get an image that looks nice and resembles what you've seen when taking the photo, you'll need to "tone map" the HDR file.
All of the programs mentioned above have a Tone mapping function that will let you get from that funny-looking image to a more natural looking photograph.
The main objective of this article is to give you a brief introduction into this technique, so it will be up to you to experiment with the different options you have for tone mapping on each program (don't be a afraid, all these programs have presets that you can try and fine tune to get something you like).
After tone mapping you'll end up with an image with less contrast than the original photos but a lot of the details in the dark and light areas.
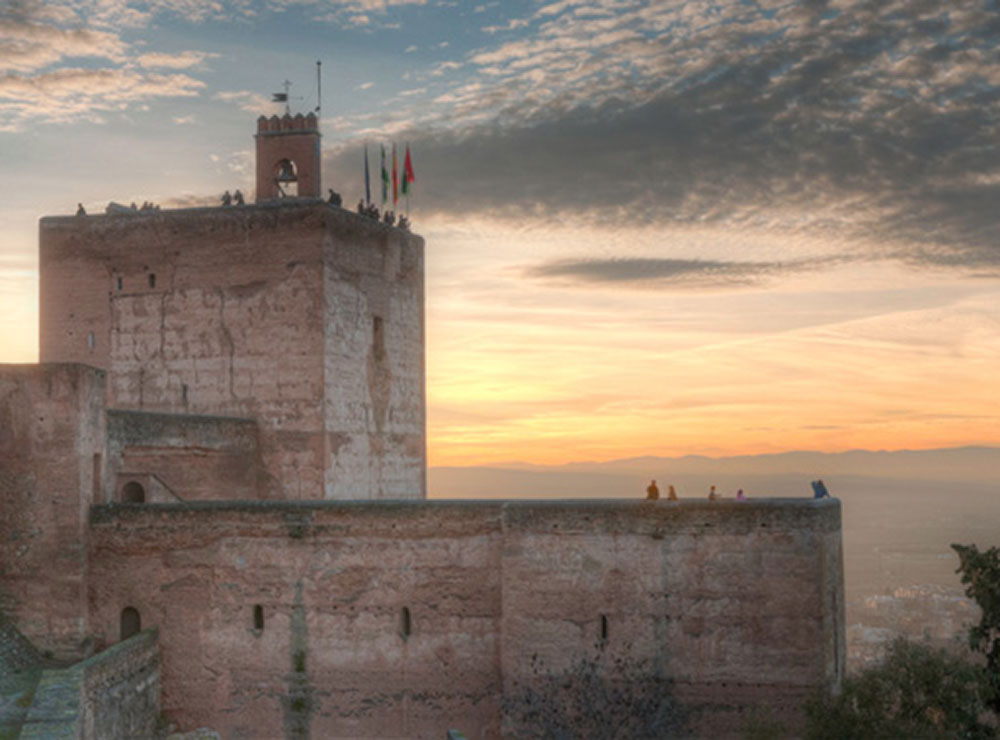 Alhambra Image after Tone Mapping.
4. Post-processing
You could leave the tone-mapped image "as is" but, you'll see that by doing some basic editing of the image, you'll get a more natural looking and pleasing photo. The resulting image of the tone-mapping process can be a JPEG or TIFF file, so you can edit it on your preferred photo-editing software.
The most common things you'll have to tweak on tone-mapped HDR photos are:
• Sharpening: After the whole HDR merging and tone mapping process, you'll see that the image might not be as sharp as they where originally, so some "capture" sharpening could be used to recover some of that lost sharpness.
• Contrast: After including the relevant information from over and under exposed photos, the resulting image is usually very dull and grayish, so increasing the contrast of the image with the "levels" adjustment or with a local-contrast increasing "Unsharp mask" (Amount: 20%, Radius: 50 and Threshold: 0) will enhance the look and recover some of the black/white on the image.
• Saturation: If you are looking for natural looking images, increasing saturation is usually not the way to go… be careful with oversaturated colors and desaturate them moderately to get a natural look.
• Ghosts: If there were moving objects, people, water,… in your bracketed photos, the HDR merging process might have created "ghosts". Some of the HDR programs mentioned above have "deghosting" tools, but they might not remove all the artifacts that the HDR process + moving objects/people create. If you are experienced with photo-editing tools, you could eliminate the ghosts by merging manually the tone mapped photo with one of the photos from your bracketed exposures, you could also use cloning tools and intelligent fill (Photoshop CS5) to fix affected areas.
• Noise reduction: This process usually increases the digital noise (http://en.wikipedia.org/wiki/Image_noise) of the resulting image, so some noise reduction should be used if needed.
After all these steps, you now have a high dynamic range image tone mapped into something that you can share, print… enjoy.
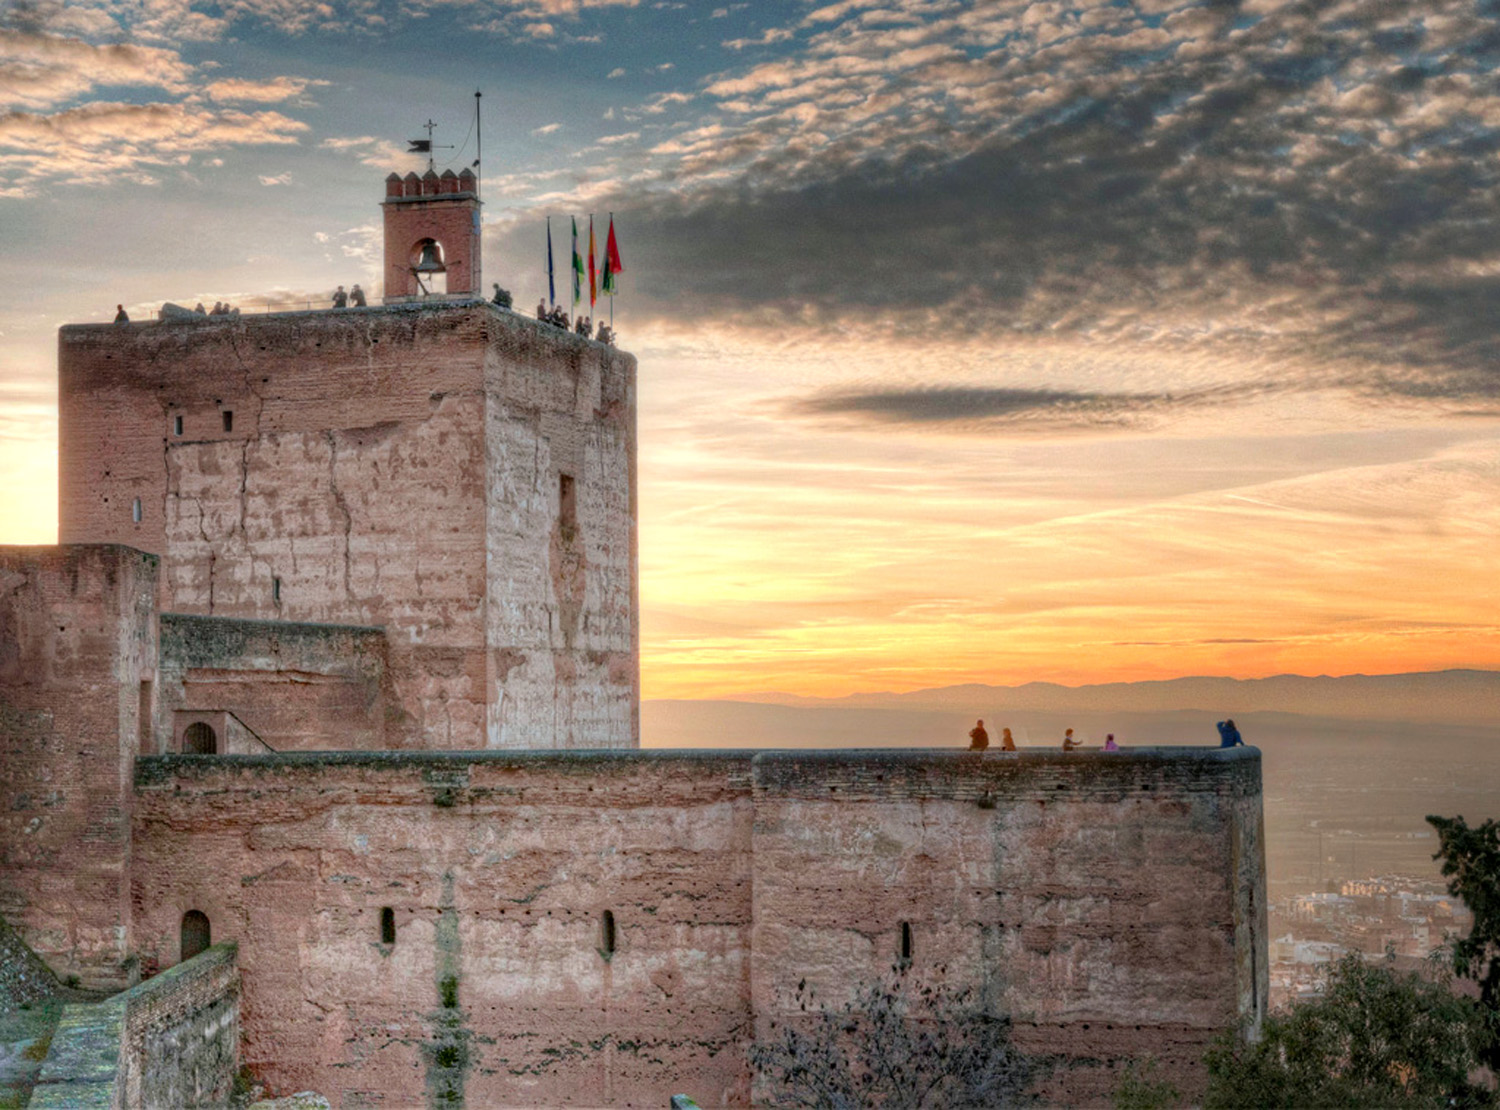 Alhambra Image after Post-Processing.
Tips
Now, since I am here to give you some tips on HDR photography and I've given you a veeery long introduction, I'll list my top 10 tips on HDR photography so you can start shooting, processing and sharing some great images right away!
1. Tripod or no tripod?
Whenever possible, use a tripod!
If you can't or don't like to carry one around, you can still get nice HDR photos. Use your camera exposure bracketing and continuous drive mode set to it's highest speed, keep a reasonably high shutter speed, and practice a good camera holding technique to minimize shake and movement between photos.
2. Use the lowest ISO possible
The HDR process usually increases the noise of the resulting image, so use the lowest ISO available/possible (specially if you use a tripod) to keep noise to its minimum.
3. Use RAW whenever possible
If your camera can output photos in RAW mode, you'll have as much information as your camera can "register" from the scene, so it's logical to use this feature if you are already trying to get a bigger (high?) dynamic range from the scene.
Capturing your images in RAW will also let you tweak noise reduction, white balances and a lot of parameters of your images on your computer, so it has a lot of benefits (for every style of photography).
4. People and moving objects
If you don't want to deal with "ghosts" generated by moving people, objects, water,… you can always create an HDR image from a single RAW file. You can "develop" the RAW file in your preferred photo editing software (Lightroom, Aperture, Photoshop,…) with different exposures and treat them like different photos from a bracketed series.
The resulting image may be noisier, but you wouldn't have to deal with the dreaded ghosts of HDR photography.
5. Saturation
It's very common to see over saturated images on the net, probably more common when you are looking at HDR photos… if you are looking for real looking images, be careful with the saturation of colors on your image.
6. Contrast is nice…
Even if you are trying to get as much detail on dark and bright areas of your photo, if you are looking for natural looking images, you'll probably need some black on your dark areas and some white (or bright colors) on your brighter areas.
Grey-ish images are not too appealing but you might end up with such an image if you are trying to keep to much detail in your image. If you are looking for technical images with as much detail as possible, that might be ok, but if you are looking for natural looking, pleasing images, some contrast is not bad ;)
7. Blue hour, night scenes, sunsets…
You'll have to learn to judge when a scene works well in HDR, but keep in mind the HDR technique when taking photos of:
• Night scenes with lots of lights from the city, reflections after a rainy day…
• Blue hour
• Sunset is usually very contrasty, so if you are trying to show detail on the foreground on backlit buildings, objects, etc. HDR is very helpful. If you are doing portraits, you'll probably get better results with some flashes.
8. Review your images
Be very careful with the resulting images of the HDR merge and tone mapping steps.
Moving objects (cars, trains,…), people, water, etc included in your photos will create unpleasant artifacts in your images after merging them into an HDR. You can review your bracketed photos selection (if you have multiple series, if you didn't use all of the images,…) and choose some photos that won't include those moving objects/people and restart the HDR merging process. You can also fix the artifacts as the first steps of photo editing after tone mapping.
Even if you have time for reediting, it's better to know if you have such artifacts in your image before doing the final post-processing.
9. Experiment, practice…
As people will always tell you, you won't master any technique if you don't experiment and practice like crazy.
Regarding HDR photography, you'll soon discover that every scene will need different settings and exposures so if you try every feature of your HDR software, fight against noise, ghosts and all derived problems of HDR imaging, the better you'll be able to handle a new situation when you find it.
10. Reprocess your images after some time
If you get bitten by the HDR-bug and keep practicing and learning, you'll probably get a lot better at merging and editing your images with time, so take your time to reprocess some of your old exposure bracketed series and see if you get a nicer looking image out of your last years photos… (I always do)
(bonus) 11. Read, look for inspiration, and check out what other people are doing.
There’s lots of information on the Internet related to HDR. I'll give you a brief list of resources you can check out:
• HDR Spotting (http://www.hdrspotting.com/) and Trey Ratcliff's Stuck in Customs (http://www.stuckincustoms.com/): Great places to look for inspiration, information, lots of tutorials, quality photos
• RC Concepción blog (http://www.aboutrc.com/blog/): Photographer and Photoshop expert… lots of articles and photos related to HDR
• Matty Wolin's Shutterrunner photoblog (http://www.shutterrunner.com/): Great HDR photography, good for inspiration ;)
About the Photographer
Daniel Prats lives and works in Madrid, Spain.
While he was traveling, he discovered a passion for photography.
Also, because of his engineering computer science background he has been working with imaging editing software as a way to complement and enhance his photographs.
You can see some of his Travel and HDR Photography here.
To learn more about HDR and other techniques feel free to visit our courses and workshops pages or call us at 646.398.7939.
Comments
Sign in to comment.